Most developers use Claude Code the same way. They copy a bug, paste it in, get a fix, move on. Then they copy a feature request, get some code, move on. Repeat forever.
That works. But it’s the slowest possible way to use it.
Claude Code can do a lot more than answer one-off questions. It can read your whole codebase, make a plan, touch a dozen files, run tests, fix the errors, and hand you finished work. Most people never get there because they skip the setup.
This guide covers exactly what to set up and why it matters.
Step 1: Create Your CLAUDE.md File
This is the most important thing you can do. Most developers have never heard of it.
CLAUDE.md is a file you put in your project root. Claude reads it automatically at the start of every session. You use it to explain your project to Claude once, so you don’t have to explain it every single time.
Without it, Claude is guessing. It doesn’t know you use camelCase. It doesn’t know you prefer functional React components. It doesn’t know you never use any in TypeScript. So it makes its own choices, and you spend time correcting them.
Put these things in your CLAUDE.md:
- Your tech stack and versions
- How you name things (files, functions, variables)
- Where different types of files live
- How you write tests
- What Claude should never do in your project
Spend 30 minutes on this once. It will save you from making the same corrections hundreds of times.
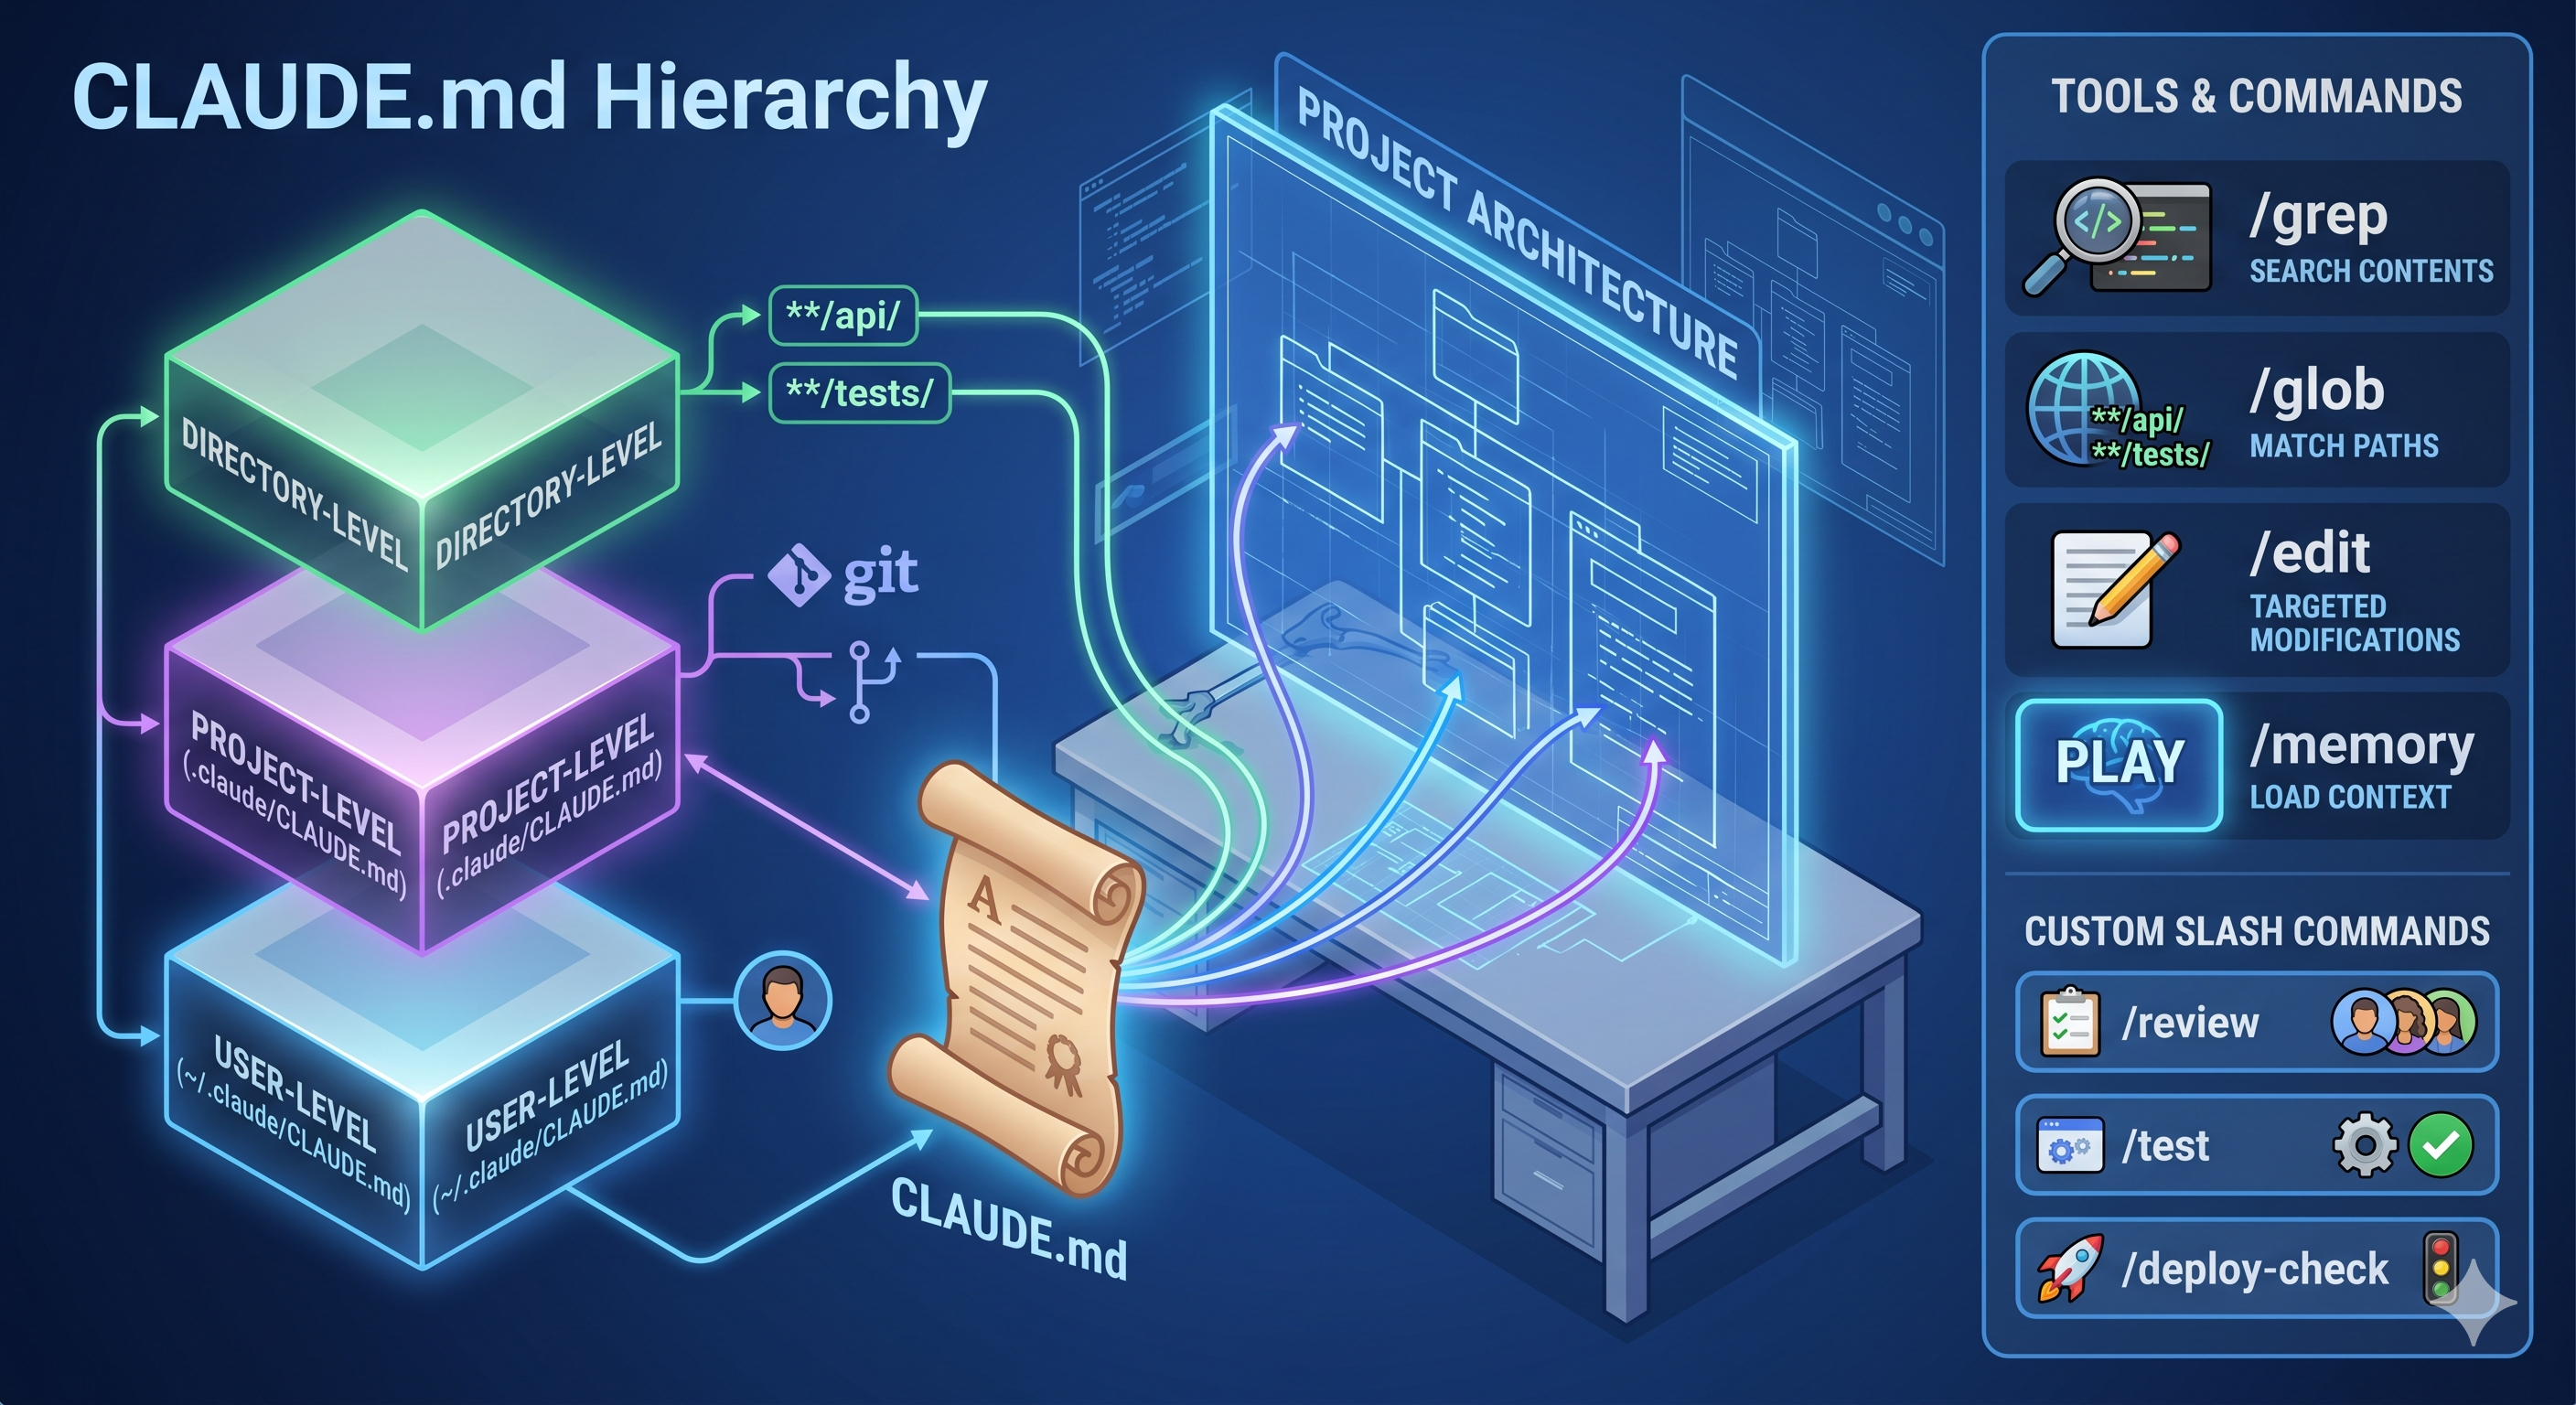
There Are Three Levels of CLAUDE.md
You can have more than one CLAUDE.md. Here is how they work:
- Your personal file at
~/.claude/CLAUDE.md. This is just for you. Things like your preferred code style or shortcuts. It is not shared with your team. - The project file at
.claude/CLAUDE.md. This gets committed to Git. Your whole team sees it. Team standards go here. - Folder-level files inside specific directories. Useful in monorepos where different packages have different rules.
Common mistake: putting team rules in your personal file. A new developer joins, Claude ignores your team’s standards for them, and nobody knows why. Keep team rules in the project file where everyone can see them.
Step 2: Use Plan Mode for Big Tasks
Claude Code has two ways to work. Knowing when to use each one is a big deal.
Direct mode is for small, clear tasks. Fix this bug. Rename this variable. Add this validation. Claude just does it.
Plan Mode is for anything bigger. Before Claude writes a single line of code, it shows you a plan. Which files it will change. What it will do in each one. What order it will do things. You read the plan, approve it, and then Claude executes.
Why does this matter? Because when Claude dives straight into a big task without a plan, it sometimes goes in the wrong direction. By the time you notice, it has already changed 15 files. Rolling that back is painful.
Simple rule: if the task touches more than two files, use Plan Mode first.
Step 3: Learn the Built-In Tools
Claude Code has several built-in tools. Most people only use a couple of them. Here are the ones worth knowing.
Grep and Glob Are Not the Same Thing
Grep searches inside files. Use it when you want to find where a function is called, or where a variable is used.
Glob matches file names and paths. Use it when you want to find all test files, or all files in a specific folder.
Using Grep when you need Glob (or the other way around) just slows things down and wastes context.
Read, Write, and Edit
Edit is the fast option. It finds a unique piece of text in your file and replaces it. Use this for small, targeted changes.
If the text appears more than once, Edit fails. In that case, use Read to load the whole file, make your changes, then use Write to save the full updated version.
The /memory Command
If Claude starts behaving strangely or ignoring rules, run /memory. It shows you exactly which files Claude has loaded into its context. This makes it easy to spot when a rule file is missing or when something unexpected is being loaded.
Build Your Own Slash Commands
You can create custom commands for things you do over and over. Put them in .claude/commands/ to share with your team, or ~/.claude/commands/ for personal use.
For example, a /review command that runs your team’s exact code review checklist. Or a /test command that generates tests in your specific format. These take about 10 minutes to set up. After that, one word replaces a paragraph of instructions every single time.
Step 4: Keep CLAUDE.md Lean. Use Skills for Everything Else.
Here is a mistake that sneaks up on people: they keep adding things to CLAUDE.md until it is enormous. Claude loads all of it every session, even when most of it is irrelevant to the current task.
The fix is Skills. A Skill is like a command that loads specific instructions only when you call it. The rest of the time, it stays out of the way.
Good rule of thumb: if something applies to every task in your project, it belongs in CLAUDE.md. If it only applies to one specific workflow, make it a Skill.
Path-Specific Rules
You can also create rules that only activate for certain file types. Put a file in .claude/rules/ with a path pattern at the top:
---
paths: ["**/*.test.tsx"]
---
All tests must use the arrange-act-assert pattern.
Never mock the database layer directly.
Now those rules only load when Claude is editing a test file. Your general sessions stay clean. Your test sessions get exactly the right context. This scales much better than trying to cram everything into one file.
Step 5: Connect Claude Code to Your CI Pipeline
Claude Code works in CI too. The key flag is -p. It runs Claude without waiting for keyboard input. Without it, your CI job will just sit there forever.
Add --output-format json and you get structured output that your pipeline can actually read and use. For example, Claude reviews a PR, outputs its findings as JSON, and your pipeline posts them as inline comments on GitHub. No human needed.
One important thing: do not use the same Claude session to both write code and review it. The session that wrote the code remembers why it made every decision, and it will defend those decisions even when they are wrong. Always start a fresh Claude session for reviews.
What a Good Day Looks Like
When you put all of this together, a normal workday changes a lot.
Morning. You describe a feature in plain English. Claude reads your CLAUDE.md, pulls in the right path-specific rules, drafts a plan. You approve it. Claude edits 8 files, writes tests, runs them, fixes the linting errors, and commits. You review the diff.
Afternoon. A PR comes in. You run /review. Claude checks it against your team’s rules and flags three problems with short explanations. You comment, request changes, done.
End of day. A new PR triggers CI. Claude runs with -p, checks for security issues, writes tests for uncovered cases, and posts the results to GitHub. You see it in the morning.
Want to Get Certified?
Anthropic offers the Claude Certified Architect Foundations exam for developers who want to formalize this knowledge. It covers config hierarchies, Plan Mode, Grep vs. Glob, path-specific rules, and CI/CD integration.
The tricky part is that the wrong answers are designed to sound reasonable. You need to know not just what each feature does, but which one to use in which situation. If you have worked through everything in this guide, you are ready.
The short version: Set up your CLAUDE.md. Learn Plan Mode. Build a couple of custom commands. Hook it into CI. That’s the whole jump from casual user to power user. It takes a few days, and after that you will ship faster than you thought was possible.